





































Why Is My Crawl Space Still Damp After Encapsulation? (9 Causes & Fixes)
Crawl space still damp after encapsulation? Find common causes of moisture and practical solutions to keep your crawl space dry and protected.

Quick answer: If your crawl space is still damp after encapsulation, the vapor barrier itself is rarely the problem. In most cases it's one of five things: a dehumidifier that's undersized, broken, or not draining; a sump pump or drainage line that isn't handling groundwater; gaps or seams in the vapor barrier and around vents; poor exterior grading still pushing rainwater toward the foundation; or a hidden plumbing leak trapped under the barrier. A healthy encapsulated crawl space should hold 50–55% relative humidity year-round — if a hygrometer shows more than that consistently, something in the system needs attention.
If you paid for encapsulation and you're still smelling mustiness, seeing condensation, or finding standing water, you're not imagining it — and you're not alone. This is one of the most common calls we get at Tri-State Waterproofing from homeowners across Georgia, South Carolina, and North Carolina. Below is exactly how we walk a homeowner through diagnosing it, in the same order our technicians check it on-site.
What a Properly Encapsulated Crawl Space Should Look Like
Before troubleshooting, it helps to know what "working" actually looks like. A correctly encapsulated crawl space has:
-
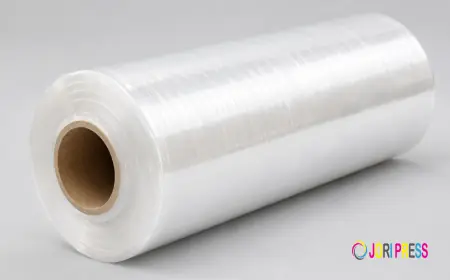
A continuous, heavy-duty vapor barrier (typically 12–20 mil) covering the entire floor and running up the foundation walls, sealed with seam tape
-
All vents, doors, and outside-air penetrations sealed and insulated
-
A properly sized dehumidifier set to maintain 50–55% relative humidity
-
A drainage plan for any water that does get in — a sump pump, French drain, or both
-
No exposed dirt, no gaps around piers or plumbing penetrations, and no ductwork left uninsulated
If any one of those pieces is missing, undersized, or damaged, the whole system underperforms — even though the plastic sheeting itself looks fine. That's the part most homeowners (and some contractors) miss: encapsulation is a system, not a product. A vapor barrier alone doesn't dry out a crawl space; it just stops new soil moisture from entering. Everything else in that list is what actually removes and controls moisture.
The Ideal Crawl Space Humidity Level (and How to Test It)
Aim for 50–55% relative humidity, with 60% as a hard ceiling. Above 60% RH, mold and mildew have everything they need to start growing on wood framing, insulation, and even the underside of the vapor barrier itself. Below about 40%, wood framing can dry out too aggressively over time, though this is a much less common problem in the humid Southeast.
To check your own crawl space:
-
Buy a basic hygrometer (roughly $15–$30) or use the digital readout on your dehumidifier if it has one.
-
Place it away from the dehumidifier's direct airflow — near the far end of the crawl space, not right next to the unit.
-
Check it at different times of day for a week, especially after rain.
-
If it's consistently reading above 60%, something below is described in the next section.
9 Reasons Your Crawl Space Is Still Damp After Encapsulation
1. The Dehumidifier Is Undersized, Failing, or Not Draining
Symptom: Humidity climbs even though the unit is running constantly. Why it happens: Crawl space dehumidifiers are sized by square footage and moisture load. A unit sized for a 1,200 sq. ft. crawl space won't keep up in a 2,000 sq. ft. one, especially in a humid climate. It's also common for the condensate line to clog or the drain pump to fail — the unit shuts itself off (or overflows) long before anyone notices. Fix: Confirm the humidistat is actually set to 50–55%, check that the condensate line drains freely to a sump pump or exterior line, and have the unit's capacity checked against your crawl space's square footage.
2. The Vapor Barrier Has Gaps, Tears, or Unsealed Seams
Symptom: Damp patches on the ground under the liner, or moisture at wall-to-floor transitions. Why it happens: Overlapping seams that weren't taped, liner that didn't run all the way up the foundation wall, or damage from someone crawling through for HVAC or plumbing work after installation. Fix: A full visual inspection of every seam and penetration point (pipes, piers, ductwork supports) — small tears are an easy patch job; missing wall coverage is a bigger repair.
3. Sump Pump or Drainage System Isn't Handling the Water
Symptom: Standing water or wet spots concentrated in one low area, especially after storms. Why it happens: No interior drainage was installed, the sump pump has failed, the float switch is stuck, or the discharge line is clogged or draining back toward the foundation. Fix: Test the pump manually, inspect the discharge line's path and end point, and confirm there's a battery backup for power outages during storms — which is exactly when you need it most.
4. Crawl Space Vents Weren't Fully Sealed
Symptom: Humidity swings with the outside weather; noticeably worse in summer. Why it happens: Old vents were covered but not air-sealed and insulated, letting warm, humid outside air leak in and condense against cooler surfaces below. Fix: Vents need to be foam-sealed and insulated from the inside, not just covered with a vent cover from the outside.
5. Exterior Grading and Downspouts Still Direct Water to the Foundation
Symptom: Moisture correlates directly with rainfall, and it's worse on one side of the house. Why it happens: Encapsulation manages what happens inside the crawl space — it does nothing to stop water pooling against the foundation outside if grading slopes toward the house or downspouts dump water within a few feet of the wall. Fix: Ground should slope away from the foundation at roughly 6 inches over the first 10 feet, and downspout extensions should carry water at least 4–6 feet away.
6. A Plumbing Leak Is Trapped Beneath the Barrier
Symptom: One consistently wet spot regardless of weather, sometimes with a higher water bill. Why it happens: A slow supply-line or drain leak under the encapsulated area goes unnoticed because the vapor barrier hides it from view — and can even trap the moisture against the slab. Fix: Any isolated, weather-independent wet spot should be treated as a plumbing issue first, checked with a moisture meter, and traced to the source before resealing.
7. HVAC Ductwork in the Crawl Space Is Sweating
Symptom: Wet insulation or dripping specifically along duct runs. Why it happens: Cold air inside ducts meets warm, humid crawl space air and condenses on the duct exterior — common when ducts weren't insulated as part of the encapsulation scope. Fix: Duct insulation and sealing at connections; this is frequently overlooked because it's technically an HVAC issue layered on top of a waterproofing project.
8. Residual Moisture Was Sealed In During Installation
Symptom: Dampness that's strongest right after installation and slowly improves. Why it happens: If the ground or framing was wet at the time of encapsulation and wasn't fully dried first, that moisture has to work its way out — which the dehumidifier will handle, but it takes time. Fix: This one often just needs time and a properly running dehumidifier; if it hasn't improved after 4–6 weeks, something else on this list is likely also contributing.
9. The Job Was a DIY Kit or Low-Bid Installation
Symptom: Multiple issues at once — thin liner, no wall coverage, no drainage, undersized dehumidifier. Why it happens: Big-box encapsulation kits and rushed installs often skip drainage planning and use liner too thin to handle foot traffic or foundation moisture, and gaps get left at piers and penetrations. Fix: A professional reassessment of the full system, not just a patch — this is the scenario where "still damp after encapsulation" usually means the system needs to be corrected, not just tweaked.
Why This Is Especially Common in Georgia & the Carolinas
Homeowners in North Georgia, South Carolina, and North Carolina deal with a specific combination of factors that make crawl spaces harder to keep dry than in other parts of the country:
-
Clay soil common throughout the Piedmont region drains slowly and holds water against foundations longer after rain than sandy or loamy soil.
-
Humid subtropical climate means outside relative humidity regularly sits above 60% for months at a time, so any air leak into the crawl space brings moisture with it.
-
Heavy, fast rain events in spring and summer can overwhelm grading and drainage that performs fine most of the year.
-
Hillside and sloped lots, common in areas like Gainesville, Athens, Woodstock, and Marietta, concentrate runoff toward one side of a foundation if grading wasn't planned for it.
This is why a system that might work fine in a drier climate can still leave a Georgia or Carolina crawl space damp — the moisture load is simply higher, and the drainage and dehumidification have to be sized accordingly.
6-Step DIY Diagnostic Checklist
Before calling anyone, this is the same sequence we walk through on a service call — you can do the first few steps yourself:
-
Check the humidity reading with a hygrometer away from the dehumidifier's direct airflow.
-
Confirm the dehumidifier is set correctly (50–55%) and listen/watch for whether it's actually cycling on and off.
-
Look at where the water is — one isolated wet spot points to plumbing; widespread dampness points to humidity/drainage; dampness that tracks with rain points to exterior grading or drainage.
-
Inspect the vapor barrier for tears, gaps at seams, and coverage up the foundation walls.
-
Walk the outside of the house after the next rain and watch where water actually goes near the foundation.
-
Test the sump pump (if you have one) by pouring a bucket of water into the basin and confirming it activates and drains properly.
If steps 1–6 don't turn up an obvious answer, or if you find standing water, active mold, or a strong musty odor, it's time for a professional inspection.
Warning Signs You Need a Professional Now
Some issues are fine to monitor for a week or two. Others shouldn't wait:
-
Standing or pooling water anywhere in the crawl space
-
Visible mold on the vapor barrier, framing, or insulation
-
A musty smell noticeable inside the living space above
-
Sagging or spongy flooring upstairs
-
Humidity readings consistently above 65–70% despite a running dehumidifier
-
Any sign the vapor barrier has separated from the wall
These point to a system component that's actively failing rather than just needs adjustment, and delaying inspection risks wood rot and structural repair costs that are far higher than fixing the moisture source.
What It Costs to Fix a Failed Encapsulation
Costs vary by cause and crawl space size, but here's a general range homeowners in Georgia and the Carolinas can expect:
|
Issue |
Typical Repair Cost Range |
|
Dehumidifier replacement/upsizing |
$1,200 – $2,800 |
|
Vapor barrier seam repair/patching |
$300 – $1,200 |
|
Sump pump repair or replacement |
$600 – $1,800 |
|
Full drainage system addition (French drain) |
$2,500 – $6,500 |
|
Exterior grading correction |
$500 – $2,500 |
|
Full re-encapsulation (poor original install) |
$5,000 – $15,000 |
If Tri-State Waterproofing performed your original encapsulation, many of these issues may be covered under warranty — it's always worth checking before assuming it's an out-of-pocket repair.
How to Keep It Dry for Good
-
Inspect the crawl space at least twice a year, and always after a major storm
-
Keep gutters clean and downspout extensions in place
-
Re-check humidity readings seasonally, not just once at installation
-
Schedule annual dehumidifier maintenance (filter cleaning, drain line check)
-
Address any new plumbing work in the crawl space by resealing the barrier immediately after
FAQs
Do I still need a dehumidifier after encapsulation?
Yes, in almost every climate in Georgia, South Carolina, and North Carolina. Encapsulation stops new soil moisture from entering, but it doesn't remove humidity that's already present or that enters through the home's living space above — a dehumidifier is what actively controls that.
How long does it take for a crawl space to dry out after encapsulation?
Typically 2–6 weeks with a properly running dehumidifier, depending on how wet the ground and framing were before installation. If it hasn't improved noticeably after 6 weeks, another cause on this list is likely involved.
Is condensation on the vapor barrier normal?
A small amount right after installation can be normal as residual moisture works its way out. Ongoing, heavy condensation usually means the humidity level is too high or there's an air leak letting warm, moist air meet the cooler barrier.
Can encapsulation actually cause mold?
Encapsulation itself doesn't cause mold, but sealing wet wood or ground moisture behind a barrier without adequate drying and dehumidification can trap conditions that let mold grow undetected. This is why proper drying before installation and a correctly sized dehumidifier afterward both matter.
What humidity level is normal in an encapsulated crawl space?
50–55% relative humidity is the target range, with 60% as the upper limit before mold risk increases significantly.
Why is my crawl space damp only after it rains?
This points to exterior water management — grading, downspouts, or drainage — rather than the vapor barrier itself. Encapsulation controls what happens inside the crawl space; it can't stop water from pooling against the foundation outside.
Can I fix a damp encapsulated crawl space myself?
Minor issues like resetting a humidistat or checking a sump pump float switch are DIY-friendly. Vapor barrier gaps, drainage additions, and sizing a dehumidifier correctly are best handled by a professional to avoid masking the real cause.
Is my encapsulation problem covered under warranty?
If a licensed contractor installed the system, many components (vapor barrier, dehumidifier, drainage) often carry a workmanship or product warranty. Check your original paperwork or contact the installer directly to confirm coverage before paying for repairs out of pocket.
What's Your Reaction?
 Like
0
Like
0
 Dislike
0
Dislike
0
 Love
0
Love
0
 Funny
0
Funny
0
 Angry
0
Angry
0
 Sad
0
Sad
0
 Wow
0
Wow
0