



























How to Digitize Photos for Embroidery: Easy Step Guide Fast
Discover how to digitize photos for embroidery with this fast, easy step guide built for real results on any fabric or machine.
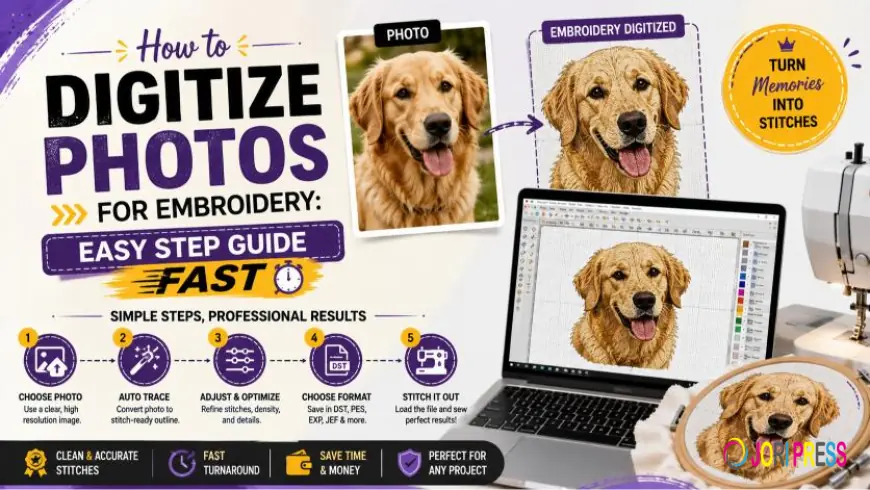
You can turn any photo into embroidery by digitizing it, which means converting the image into a stitch file your machine can read. If you are searching for how to digitize photos for embroidery , the fastest path is to prepare the image, trace the shapes, pick stitch types, and export it as a DST or PE S file. Skip any of these steps and the design may look rough once it hits the fabric.
This process sounds technical, but it follows a clear order once you understand it. Many people turn to embroidery digitizing service providers because a rushed job often leads to uneven stitches, thread breaks, or colors that bleed into each other. A steady, well-planned digitizing service for embroidery protects your fabric and your budget from costly redo work.
What Happens When You Digitize a Photo
Digitizing a photo is the process of mapping out stitch paths, directions, and thread colors so an embroidery machine can sew the design correctly. The machine reads a special file, not the photo itself, so every curve and detail has to be planned in advance.
You may notice that photos with soft shadows or fine gradients rarely translate well into thread. Embroidery works best with bold shapes and clean edges, which is why flattening detail early on saves a lot of frustration later.
Step 1: Pick the Right Photo to Start With
A sharp, well lit photo gives you the best starting point. Dark or grainy images are hard to trace cleanly and often produce blotchy results once stitched.
Let's look at why this matters so much. A photo with strong outlines, like a company logo or a simple portrait, converts far more smoothly than a busy scene with lots of small objects. This is a core rule followed by any best embroidery digitizing service working on client photos daily.
Step 2: Reduce the Photo to Key Shapes and Colors
Break the photo down into its main shapes and cut the color count to something manageable, usually six to eight shades. Too many colors make small designs look cluttered and slow down the stitching machine.
In my experience, simplifying a photo early prevents most of the headaches that show up later in the digitizing process. This step is central to digitizing services for embroidery, since a cleaner base file always leads to a cleaner final product.
Step 3: Trace the Design Using Digitizing Tools
Now trace the outlines carefully, either by hand or with vector based tools inside your digitizing software. This stage decides the exact shape your thread will follow, so rushing here almost always shows up in the final piece.
Here's why it matters. Careful tracing at this point is what separates a custom embroidery digitizing service that delivers crisp results from one that leaves rough, jagged edges on the fabric.
Step 4: Choose Stitch Types for Each Section
Different parts of a design need different stitches. Small letters typically use a satin stitch, wide areas use a fill stitch, and thin outlines often use a running stitch. Picking the wrong type is one of the most common beginner mistakes.
I've noticed that many home embroiderers skip this step and wonder later why their design looks flat. A trained digitize embroidery service always matches stitch type to the size and shape of each section before sewing begins.
Step 5: Adjust Stitch Density and Direction
Stitch density controls how tightly threads sit next to each other, while direction changes how the fabric catches light. Set density too high and thin fabric may pucker. Set it too low and gaps can appear.
That's why many designers recommend testing settings on a fabric scrap that matches your final project. Providers offering embroidery digitizing services in USA often fine tune density based on whether the fabric is a t shirt, cap, or towel.
Step 6: Test Stitch Before Running the Full Design
Always run a test stitch on similar fabric before committing to the final piece. This simple habit catches thread issues, color mismatches, and spacing problems before they ruin your project.
I've seen this work well in many homes where a quick test saved an entire batch of shirts from being wasted. Any solid online embroidery digitizing service builds this step into their normal workflow without exception.
Why Work With a Professional Digitizing Service
A custom embroidery digitizing services provider brings years of hands on skill that most software alone cannot replace. They understand fabric stretch, needle behavior, and how fine details hold up once stitched.
People searching for an embroidery digitizing service near me usually want dependable turnaround without learning complex software themselves. Choosing a best embroidery digitizing service provider in USA often means fewer mistakes, faster delivery, and designs that look sharp the first time around.
Mistakes to Avoid While Digitizing Photos
Keeping these common issues in mind helps you match the standard set by best embroidery digitizing services providers in the USA.
-
Starting with a blurry or low quality photo
-
Ignoring pull compensation, which shrinks designs slightly after stitching
-
Picking too many colors for a small design
-
Skipping the test stitch stage entirely
-
Mismatching stitch direction with the fabric type
Small fixes like these often make the biggest difference in how finished embroidery actually looks.
Final Thoughts
Knowing how to digitize photos for embroidery gives you real control over how your finished designs turn out, from a simple monogram to a detailed portrait. Every step, from picking the right photo to running a test stitch, plays its own part in the outcome.
IDIGITIZE.COM has encouraged countless small business owners and hobbyists to lean on professional support instead of fighting with confusing software alone. Turning to IDigitize means your photos receive careful, experienced handling that turns simple pictures into embroidery worth showing off.
Frequently Asked Questions
How do you digitize a photo for embroidery quickly?
Clean up the photo, simplify its shapes and colors, trace the outlines, assign stitch types, and export it as a machine ready file like DST or PES.
Why does my embroidery design look different from the photo?
Embroidery cannot copy fine gradients or shadows, so soft details in a photo often turn into simpler shapes once stitched.
What is the best file format for embroidery machines?
Common formats include DST, PES, EXP, and JEF, and the right one depends on your specific embroidery machine.
How many colors should a digitized design use?
Most designs work best with six to eight thread colors, since too many can make the stitching look busy or cluttered.
Should I test stitch a design before the final run?
Yes, a quick test stitch on scrap fabric catches spacing and color issues early, saving both fabric and time.
What's Your Reaction?
 Like
0
Like
0
 Dislike
0
Dislike
0
 Love
0
Love
0
 Funny
0
Funny
0
 Angry
0
Angry
0
 Sad
0
Sad
0
 Wow
0
Wow
0