


















Embroidery Digitizing: The Complete Guide to Turning Artwork Into Perfect Stitches

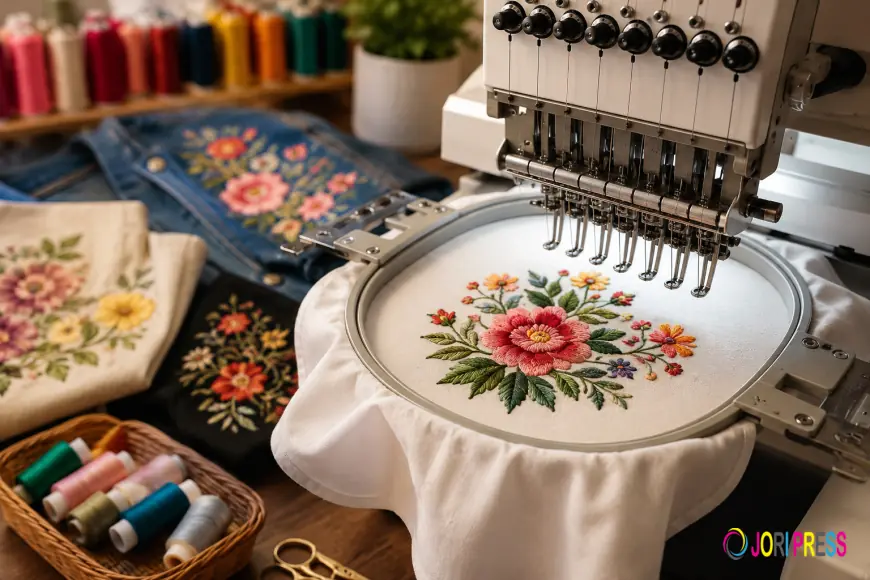
If you've ever wondered how a flat logo on your screen becomes a crisp, clean design stitched onto a cap, jacket, or polo shirt, the answer is embroidery digitizing. It's the invisible step between “I have a logo” and “I have a beautifully embroidered product” — and it's one of the biggest factors separating professional-looking embroidery from something that looks amateur, puckered, or distorted.
In this guide, we'll break down exactly what embroidery digitizing is, how the process works, why it matters so much for the final result, and how to choose a reliable digitizing partner that won't compromise your artwork or garments. Whether you're a business owner ordering your first batch of branded polos or an embroiderer trying to understand why some files stitch out beautifully while others don't, this article is for you. At Risedigitizing, we focus on turning artwork into embroidery-ready files that are designed for clean, accurate, and professional stitching.
What Is Embroidery Digitizing?
Embroidery digitizing is the process of converting artwork — a logo, image, or design — into a stitch file that an embroidery machine can read and execute. Unlike a printer, an embroidery machine doesn't understand pixels or vector shapes. It only understands a sequence of stitch commands: where the needle enters the fabric, what direction it moves, how dense the stitches are, and when the thread changes color.
A skilled digitizer (often using specialized software, but always applying human judgment) manually maps out every one of these decisions. This is very different from simply "auto-converting" an image, which is why true professional embroidery digitizing relies on manual, experienced work rather than fully automated software. You can see how this is applied in practice on our embroidery digitizing services page.
The output is a digitized embroidery file, saved in a machine-readable format such as DST, PES, JEF, EXP, VP3, or EMB, ready to be loaded onto an embroidery machine and stitched onto fabric.
Why Embroidery Digitizing Matters So Much
It's tempting to think of digitizing as a purely technical, behind-the-scenes step — but it's really the difference between a design that looks great in thread and one that looks flat, distorted, or messy. A design can look flawless as a JPEG or vector file and still turn into a disaster once it hits the embroidery machine if it wasn't digitized properly.
Here's what quality digitizing directly affects:
- Stitch coverage and clarity – Whether fine details, small text, and thin lines are actually visible once stitched
- Fabric behavior – Whether the garment puckers, stretches, or distorts under the needle
- Production efficiency – Excessive trims, jumps, and thread breaks slow down machines and add cost
- Color accuracy and separation – Making sure gradients, shading, and overlapping elements translate properly into thread
- Longevity – Poorly digitized designs are more prone to thread breaks and fraying over time
In other words, digitizing isn't a formality — it's the engineering behind the artistry.
How the Embroidery Digitizing Process Actually Works
While every digitizer has their own workflow, professional embroidery digitizing generally follows these stages:
1. Artwork Analysis
Before a single stitch is planned, the digitizer studies the artwork: its complexity, color count, small text, fine details, and the intended garment or fabric. A logo destined for a left-chest polo needs a completely different approach than the same logo blown up for a jacket back.
2. Choosing Stitch Types
Digitizers select from several stitch types depending on the shape and size of each element:
- Satin stitches – Ideal for text, borders, and narrow shapes, giving a smooth, glossy finish
- Fill stitches – Used for larger areas, filling in bulk shapes with rows of stitching
- Running stitches – Thin outlines or fine detail lines
3. Setting Underlay
Underlay stitches form a foundation layer beneath the visible top stitching. This stabilizes the fabric, prevents shifting, and supports the top stitches so the final design doesn't sink into stretchy or high-pile fabrics.
4. Determining Density and Stitch Direction
Stitch density controls how tightly threads are packed together. Too dense, and the fabric puckers or stiffens; too sparse, and the design looks thin or lets fabric show through. Stitch direction also affects how light reflects off the thread, adding texture and depth to flat artwork.
5. Sequencing and Color Breaks
The digitizer plans the order in which sections are stitched to minimize jump stitches, trims, and color changes — improving both the finished look and machine efficiency.
6. Testing and Quality Review
Before delivery, the file is checked (and ideally test-stitched) to confirm registration, density, and overall stitch quality meet production standards.
Common Embroidery Digitizing Applications
Not every design is digitized the same way. The application dramatically changes how a digitizer approaches density, underlay, and stitch structure.
Left Chest Logos
Small designs on polos, T-shirts, and hoodies require precise stitch planning since there's little room for error. Overly dense or poorly arranged stitching can cause puckering on a design this size.
Jacket Back Designs
Large-format embroidery needs a different structure entirely — stitch count, sequencing, and weight distribution all need careful planning to keep a big design looking clean rather than heavy or stiff.
3D Puff Embroidery
Puff embroidery uses foam underneath the stitching to create a raised, three-dimensional effect, popular on caps and hats. This requires specialized digitizing to avoid gaps or foam show-through.
Caps and Hats
Curved surfaces like caps require digitizing that accounts for the shape of the cap frame, ensuring the design doesn't distort once stitched on a curved panel.
Photo and Portrait Embroidery
Turning a photograph into thread requires careful handling of shading, contrast, and facial detail — arguably one of the most technically demanding forms of digitizing. For the best results, the original image needs to be as high-resolution as possible.
Chenille Embroidery
Chenille creates a raised, textured "letterman jacket" look using specialized loop stitches, requiring a completely different digitizing structure than standard flat embroidery.
Monograms
Personalized initials and script lettering need careful attention to spacing, alignment, and stitch flow to look polished rather than cluttered.
Custom Embroidery Patches
Patches combine digitizing with backing, border, and finishing choices, making them a distinct category worth understanding on their own — you can see examples of finished patch work on our custom embroidery patches page..
Embroidery Digitizing vs. Vector Art: What's the Difference?
These two services are often confused, but they solve different problems:
- Embroidery digitizing converts artwork into a stitch file for embroidery machines.
- Vector art conversion turns a raster image (like a JPG or PNG) into a scalable vector file (AI, EPS, SVG) used for clean printing, resizing, or as clean source artwork for future digitizing.
If your logo only exists as a low-resolution image, you may need vector redrawing before — or alongside — digitizing. Many providers, including our own vector art services, offer this as a separate but complementary service to embroidery digitizing. Vector art is also the foundation for screen printing, so it's worth having clean vector files on hand even if embroidery is your main goal.
What File Formats Are Used in Embroidery Digitizing?
Different embroidery machine brands read different file formats. A quality digitizing service should be able to deliver in whichever format your machine requires, including:
- DST – Tajima, the most widely used industry-standard format
- PES – Brother and Babylock machines
- JEF – Janome machines
- EXP – Melco/Bernina machines
- VP3 – Husqvarna Viking and Pfaff
- EMB – Wilcom's native editable format
A reliable digitizer will always confirm your machine's required format before delivering the final file.
How to Choose the Right Embroidery Digitizing Service
Not all digitizing is created equal, and the cheapest option often costs more in the long run through re-dos, poor stitch quality, and wasted garments. Here's what to look for:
- Manual digitizing, not just auto-conversion – Ask whether designs are hand-digitized by an experienced digitizer or run through automated software with minimal human review.
- Experience with your specific application – A digitizer skilled at left-chest logos isn't automatically skilled at photo embroidery or chenille.
- Turnaround time that fits your deadline – Standard, fast, and rush options should be available depending on urgency.
- Free or fair revision policy – Stitch-outs don't always match expectations on the first try; a good provider will adjust the file at no extra cost.
- Proof or sample before bulk production – Especially important for large or repeat orders.
- Portfolio of real, varied work – Look for a track record across logos, text, portraits, and specialty techniques like 3D puff or chenille. You can browse examples of finished projects in our to see the range of work involved.
If you're weighing several providers, it's also worth comparing their full service offerings rather than just their digitizing price — a provider who also offers vector redrawing and screen printing can save you time on future projects.
Frequently Asked Questions About Embroidery Digitizing
What is embroidery digitizing, and how does it work? Embroidery digitizing converts a logo or image into a stitch file that embroidery machines can read, translating flat artwork into a precise sequence of needle movements, stitch types, and thread colors.
How long does embroidery digitizing take? Turnaround varies by design complexity and provider, but most professional services offer standard, fast, and rush options ranging from a few hours to a couple of days.
What file formats do embroidery digitizing services support? Most professional providers support all major formats, including DST, PES, JEF, EXP, VP3, EMB, and others, depending on your embroidery machine.
Can any image be digitized for embroidery? Most images can be digitized, but very low-resolution or overly complex images may need vector redrawing first to achieve clean, accurate results.
How much does embroidery digitizing cost? Pricing typically depends on design complexity, size, and turnaround speed. Many providers offer credit packs or membership pricing for businesses with ongoing digitizing needs — for example, our own design credit packs and RisePass membership options are built for repeat customers who need frequent digitizing.
What's Your Reaction?
 Like
0
Like
0
 Dislike
0
Dislike
0
 Love
0
Love
0
 Funny
0
Funny
0
 Angry
0
Angry
0
 Sad
0
Sad
0
 Wow
0
Wow
0