








































Setting Up a Development VPS: How to Configure a Staging Environment for Web Apps, Broken Down for Real-World Use
Set up a development VPS for web app staging. Learn how to configure SSH, databases, HTTPS, deployments, backups, and testing before releasing to production.
I run the application on a laptop. The first server deployment stops file uploads from working. Login redirects point to the domain, and the background worker cannot read its configuration. The code passed testing; the environment did not.
A staging environment gives me a place to find these problems before customers see them. For a team a modest virtual private server can give that space without needing a complex infrastructure platform.
The useful starting point is a Linux server with the same important software versions, configuration patterns and deployment steps, as production.
Why a Staging Environment Matters?
Development is the place were code changes often. Staging is the place where a particular release candidate is tested in conditions that look like production.
Use Staging to check features database migrations, dependencies, permissions, HTTPS and deployment scripts at once. A migration that works on a local database may fail on older data. An upload form that works may break if the server process does not have directory access.
Staging also lets you test performance. Results from a small VPS may not show how a larger production system behaves when it is under load.
Local Host vs Development VPS
Local development and remote staging usually work best together.
|
Consideration |
Localhost |
Development VPS |
|
Daily coding |
Fast edits and easy debugging |
Remote access adds some friction |
|
Cost |
No separate hosting bill |
Recurring server and backup costs |
|
Connectivity |
Can work offline once dependencies are available |
Requires network access |
|
Environment |
May differ from production OS and services |
Can reproduce the production Linux stack |
|
Team access |
Often needs tunnels or screen sharing |
Shared address for developers and reviewers |
|
Deployment testing |
May bypass server configuration |
Exercises SSH, firewalls, HTTPS, and service restarts |
Teams that are thinking about developing with VPS hosting usually need a place where they can test things that their laptops can't always recreate.
Keep building on your computer. Send a version that's under control to the staging area when it’s time for more people to test it.
Choosing VPS Resources for a Staging Environment
These are starting examples, not universal requirements:
|
Application |
vCPU |
RAM |
SSD/NVMe storage |
|
Small WordPress or PHP application |
1–2 |
2–4 GB |
40–80 GB |
|
Small Node.js or Python application |
2 |
4 GB |
50–80 GB |
Allow space for the database, uploads, logs, dependencies, and retained releases. On-server builds can need more memory than the running application.
Choose a supported Ubuntu LTS or Debian release where it matches production. Check network allowances, connectivity to external services, and the cost of off-server backups.
For meaningful capacity testing, staging needs resources and infrastructure closer to production, including comparable database size and caching.
Step 1: Deploy the VPS and Perform Initial Hardening
On Ubuntu or Debian, refresh package information with sudo apt update, then review and install updates using sudo apt upgrade.
Create a non-root deployment account with sudo adduser deploy. Give administrative access only where needed; the application process should run without elevated privileges.
Install your SSH public key for that account and confirm access in a second session before disabling root login or password authentication. Keep the original session open during changes. Validate SSH configuration with sudo sshd -t before reloading it, following Ubuntu’s OpenSSH guidance.
Configure UFW and any provider firewall to allow the actual SSH port from trusted addresses or a VPN. Permit web traffic as needed; keep database ports private. Add the SSH allowance before enabling the firewall. Ubuntu’s firewall documentation covers UFW rules.
Disable unused services. Check automatic security updates and reboot settings rather than assuming the server image has suitable defaults. Ubuntu documents these through unattended upgrades.
Monitor disk usage, memory, CPU, and failed systemd services.
Step 2: Install the Application Stack
Install what your application uses:
- PHP: Nginx or Apache, PHP-FPM where appropriate, required PHP extensions, MySQL/MariaDB, and Git.
- Node.js: The production Node.js version, npm or pnpm, Nginx, and systemd or PM2 to supervise the process.
- Python: The matching Python version, a virtual environment, Gunicorn or an appropriate ASGI server, Nginx, and the required database.
Match production versions and dependency lockfiles. Installing the newest runtime can hide compatibility problems with the version customers actually use.
Run application services under a dedicated account. Allow writes only to directories that need them, such as uploads or caches. Avoid blanket 777 permissions and making the whole codebase writable by the web process.
Step 3: Configure a Staging Domain or Subdomain
Use a clear hostname such as staging.example.com, dev.example.com, or test.example.com.
Create an A record pointing to the VPS’s IPv4 address. Add an AAAA record only when IPv6 is configured and reachable.
Create a separate application directory, such as /var/www/myapp-staging, and a web-server configuration for that hostname. Point the document root at the application’s public directory.
For Node.js or Python, a reverse proxy accepts browser requests and forwards them to the application, typically listening to localhost. Nginx explains this in its reverse proxy documentation.
Verify DNS, upstream addresses, and application URLs before importing data. A staging site setup should never route requests into production accidentally.
Step 4: Configure the Staging Database
Create a database and user. Limit that user to the staging database. Only allow the operations that are needed. Where it makes sense give permissions to change the schema to an account that is used for migrations.
Bind the database on the VPS to localhost. If using a database server use private networking and restrict access, to only trusted sources.
Export and import data using the database’s built-in tools. Remove any information and replace sensitive values before loading the staging copy. Often synthetic records work as well.
Never treat staging as a copy of production data that contains sensitive information.
Test migration scripts using records, including older entries and incomplete ones. Always back up the staging database before running tests that could delete or change data.
Step 5: Configure Environment Variables
Keep database passwords API keys, signing secrets, SMTP credentials and payment credentials outside source code.
Use a protected.env file or server managed environment configuration. A.env file is not encrypted storage: exclude it from Git keep it outside the public document root and restrict file access.
Give staging its database connection, application URL, secrets, email destination and third-party sandbox credentials. Check framework settings; an arbitrary environment name may not enable production, like behavior.
Send email to a capture service or approved test inboxes. Restart affected services after configuration changes. Confirm that logs do not expose secrets.
Step 6: Set Up Git-Based Deployment
Use a repeatable path:
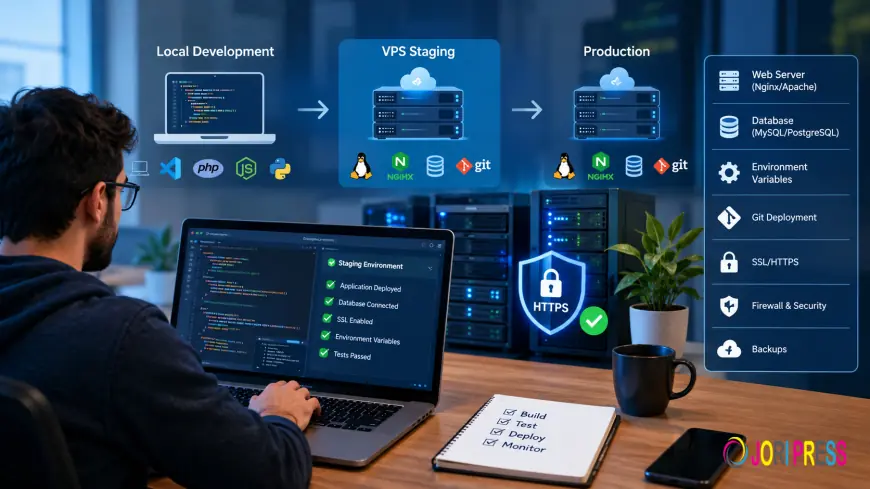
Developer → Git repository → Staging VPS → Testing → Production
For a small project, a deployment script can:
- Fetch the repository and check out an identified commit or release tag.
- Install dependencies using committed lockfiles.
- Build assets and run required pre-deployment checks.
- Back up relevant data and apply reviewed migrations.
- Activate the release and restart application services and workers.
- Check health endpoints, logs, and core user journeys.
Use a read-only repository credential where possible. Avoid editing tracked files on the server.
Retain the previous release for rollback. Reverting code does not automatically reverse database changes; plan compatible migrations or a tested recovery procedure. Promote the tested commit or build artifact to production.
Step 7: Configure SSL and Production-Like Web Settings
I recommend using HTTPS on staging to test cookies, authentication callbacks, redirects and mixed content.
Install a trusted TLS certificate and automate renewal. For a site behind access restrictions choose certificate validation deliberately: Let’s Encrypt’s HTTP-01 validation requires port 80 access while DNS-01 can validate a hostname without exposing your application.
Redirect HTTP, to HTTPS while preserving the chosen validation method. Match relevant production headers, upload limits, timeouts and catching rules.
Configure the framework to trust forwarded headers from your proxy. Incorrect scheme detection can cause redirect loops or insecure callback URLs.
Step 8: Test the Staging Environment
Run this checklist after deployment:
- Login, logout, registration, and password resets work.
- Forms and database writes handle valid and invalid inputs.
- Uploads respect permissions, size limits, and storage paths.
- Email reaches test inboxes only.
- API calls use sandbox credentials and expected endpoints.
- Cron jobs and background workers run without production side effects.
- HTTPS, redirects, cookies, and authentication callbacks behave correctly.
- Catching updates correctly after content changes.
- Errors produce useful private logs without public stack traces.
- Migrations are complete, and rollback or recovery has been rehearsed.
Watch resource usage during these tests. A successful homepage request does not prove that workers, scheduled tasks, or database connections are healthy.
Keep Staging Separate from Production
I recommend you check every connection in your staging server configuration. Separate the databases API keys, storage buckets, queues, cache namespaces and email settings. Use payment sandboxes and dedicated webhook endpoints. Remove any copied production integrations before you start workers or scheduled jobs. Restrict reviewer access by using a VPN, a gateway or HTTP authentication over HTTPS. Search‑engine blocking is a housekeeping step but robots.txt and noindex do not give you access control. A visible staging banner also helps reviewers keep test records, from live business activity.
Common Development VPS Setup Mistakes
Check these before inviting reviewers:
- Running application processes as root.
- Reusing production credentials.
- Importing customer data without sanitization.
- Leaving database or unnecessary service ports exposed.
- Allowing runtime versions to drift from production.
- Displaying debug output publicly.
- Keeping no recoverable backups.
- Sending notifications to real customers.
- Assuming code rollback reverses migrations.
- Letting customers depend on staging as an unofficial production service.
Store protected backups off the VPS and tested a restore. Include necessary uploads and configuration, alongside database backups. A snapshot alone may not provide an application-consistent recovery point.
When a VPS-Based Staging Environment Makes Sense
A VPS works well for freelancers, agencies, small startup teams, WordPress projects and SaaS prototypes that need shared Linux-based testing. It’s especially helpful when someone on the team can handle the operating system and services.
Docker can run on that VPS. Containers help with package dependencies. They don’t replace credentials management, backups or network isolation. Docker Compose lets you set up staging and production configurations, with environment- changes.
Teams already using Kubernetes, complex delivery pipelines, managed cloud services or regulated infrastructure should usually replicate those conditions. A standalone VPS might miss the behavior they need to test.
A Practical Staging Workflow
- Build locally.
- Commit to Git.
- Deploy the selected version to staging.
- Run the build and migrations.
- Test functionality.
- Review logs and performance.
- Fix issues.
- Repeat deployment and checks.
- Approve the release.
- Deploy the tested version to production.
Record the release identifier and test results. Repeating the same procedure makes missing dependencies and configuration drift easier to spot.
Conclusion
A useful staging VPS starts with a manageable setup that reflects how the application will run in production. Match important versions and settings, separate data and credentials, and rehearse deployment and recovery.
What's Your Reaction?
 Like
0
Like
0
 Dislike
0
Dislike
0
 Love
0
Love
0
 Funny
0
Funny
0
 Angry
0
Angry
0
 Sad
0
Sad
0
 Wow
0
Wow
0