


DIY Drip Irrigation: Easy Steps to Set Up Your Own System
Discover simple steps to create your own DIY drip irrigation system and ensure your plants thrive with efficient watering!

Introduction
Watering plants efficiently is essential for healthy growth and sustainability. Traditional irrigation systems often waste water due to evaporation, runoff, and inefficient distribution. To solve this problem, many farmers and gardeners are switching to drip irrigation.
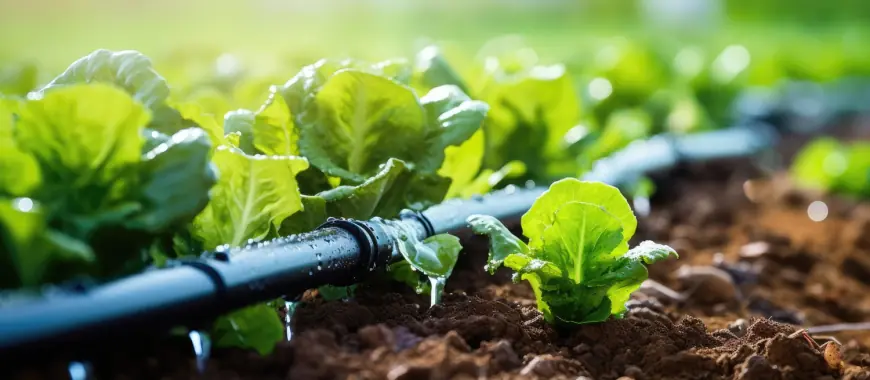
Drip irrigation is a highly efficient watering method that delivers water directly to plant roots through a system of tubes, emitters, and valves. Unlike other irrigation systems, it conserves water, reduces costs, and promotes healthier plants. Whether you have a home garden, a farm, or a green house, setting up a drip irrigation system is a smart investment.
This guide will walk you through the step-by-step process of setting up a DIY drip irrigation system, ensuring optimal water usage for your plants.
Why Choose Drip Irrigation?
A drip irrigation system is a great alternative to traditional watering techniques like sprinklers and hand-watering. Here are some key benefits:
1. Water Conservation
- Unlike sprinkler irrigation systems, which spray water over large areas, drip irrigation targets plant roots, reducing evaporation and runoff.
2. Cost Savings
- Uses less water, reducing water bills.
- Requires minimal maintenance compared to large sprinkler systems.
3. Healthier Plants
- Delivers consistent moisture directly to roots.
- Prevents overwatering and underwatering.
4. Weed and Disease Control
- By applying water only where needed, weeds receive less moisture and grow less.
- Reduces fungal diseases caused by excess moisture on leaves.
5. Minimal Soil Erosion
- Unlike irrigation sprinkler systems, which can wash away soil, drip irrigation provides gentle watering without disturbing the soil.
Drip Irrigation vs. Irrigation Sprinkler System
When selecting an irrigation system, it is important to compare drip irrigation with an irrigation sprinkler system to determine the best option for your needs.
Drip Irrigation System:
✔️ Delivers water directly to plant roots, reducing evaporation.
✔️ Ideal for row crops, flower beds, and green houses.
✔️ Requires water filtration to prevent clogging.
Irrigation Sprinkler System:
✔️ Covers large areas using overhead sprays.
✔️ Best for landscape irrigation and lawns.
✔️ Requires a water sprinkler for garden to ensure even water distribution.
While drip irrigation is best for targeted watering, an irrigation sprinkler system is great for larger fields and lawns. Some gardeners combine both for maximum efficiency.
How to Set Up a DIY Drip Irrigation System
Step 1: Plan Your System
Before setting up your drip irrigation system, take time to plan the layout:
✔️ Identify plants that need watering.
✔️ Measure the area where you will install the system.
✔️ Decide the best tubing arrangement for even coverage.
Step 2: Gather Materials
To build a basic drip irrigation setup, you’ll need:
✔️ Mainline tubing (½-inch or ¾-inch) – Carries water from the source.
✔️ Drip tubing (¼-inch) – Delivers water to plants.
✔️ Emitters – Release water at a controlled rate.
✔️ Water filtration system – Prevents clogs.
✔️ Pressure regulator – Ensures even water flow.
✔️ Hose adapter – Connects the system to a faucet or tank.
✔️ Drip stakes – Secures the tubing in place.
✔️ Timer (optional) – Automates watering for efficiency.
Step 3: Assemble the System
1️⃣ Connect the mainline tubing to your water source.
2️⃣ Install a water filtration system to prevent dirt and debris from clogging the emitters.
3️⃣ Attach a pressure regulator to maintain consistent water flow.
4️⃣ Lay out the drip tubing along plant rows, securing it with stakes.
5️⃣ Install emitters near the roots of each plant.
Step 4: Connect to a Water Source
A drip irrigation system can be connected to different water sources, such as:
✔️ A garden hose
✔️ A rainwater harvesting system
✔️ A well or underground tank
Ensure the water pressure is balanced for even distribution.
Step 5: Test the System
✔️ Turn on the water and check for leaks.
✔️ Ensure each emitter is releasing the correct amount of water.
✔️ Adjust tubing placement if necessary.
Maintaining Your Drip Irrigation System
To keep your drip watering system in good condition, follow these maintenance tips:
1. Check for Clogs
- Clean filters regularly to prevent blockages.
- Flush the system every few weeks to remove dirt buildup.
2. Inspect for Leaks
- Repair any cracks or loose connections to prevent water waste.
3. Adjust Watering Frequency
- Monitor soil moisture levels and adjust watering schedules as needed.
4. Clean the System Periodically
- Flush the tubes to prevent mineral buildup.
Enhancing Water Efficiency with Drainage Systems
A well-planned irrigation system should include drainage systems to prevent overwatering. Drainage systems help remove excess water, reducing the risk of root rot and soil erosion.
For better water management, you can combine drip irrigation with proper drainage systems to ensure plants receive the right amount of moisture without flooding the soil.
Conclusion
Setting up a DIY drip irrigation system is an easy and cost-effective way to ensure efficient watering while conserving water. Whether you're growing vegetables, flowers, or managing a green house, drip irrigation provides precise hydration with minimal waste.
By following these simple steps, you can install your own drip watering system and enjoy healthier plants, reduced water bills, and a more sustainable garden. Take control of your watering needs and create an irrigation system that works best for your environment!
What's Your Reaction?
 Like
0
Like
0
 Dislike
0
Dislike
0
 Love
0
Love
0
 Funny
0
Funny
0
 Angry
0
Angry
0
 Sad
0
Sad
0
 Wow
0
Wow
0