


How to Achieve the Perfect Shiny Mirror Glaze Every Time
Struggling with mirror glaze? Discover tips and techniques to achieve a flawless, shiny finish every time and make your cakes look truly professional.
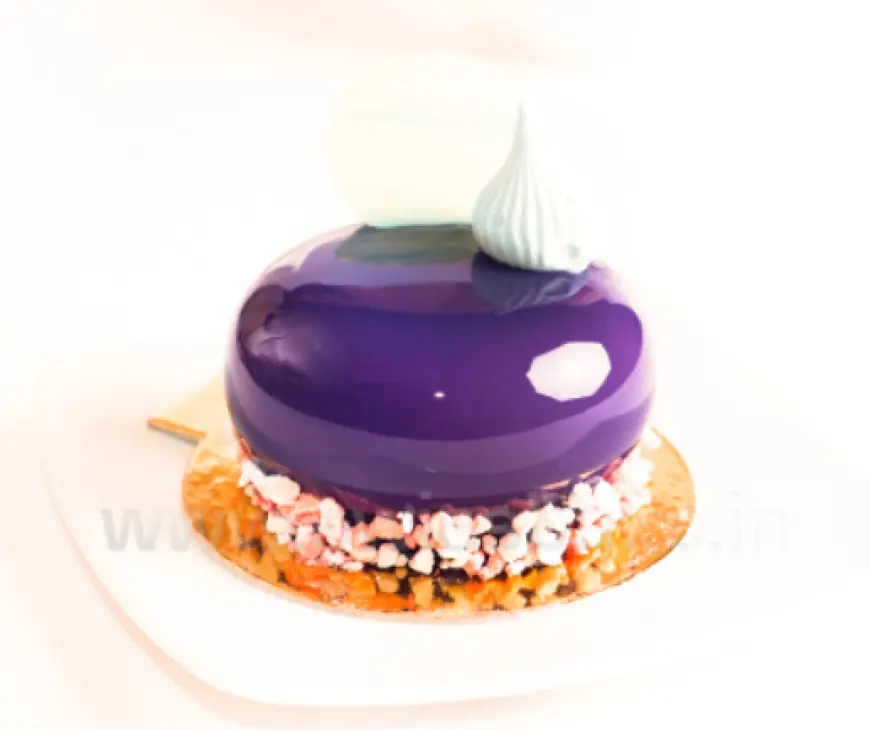
In the world of modern pastry, stunning cakes and entremets, mirror glaze has become an essential technique for creating stunning, visually striking cakes and desserts. That flawless, glass-like finish not only enhances presentation but also reflects the craftsmanship behind each creation. However, achieving a consistent, ultra-smooth, and perfectly shiny glaze requires precision, understanding of ingredients, and mastery over temperature control.
For patissiers and professional bakers, mastering this skill can set your creations apart. Let’s explore the essential techniques, tips, and troubleshooting methods to perfect your mirror glaze every time.
1. Understand the Science Behind a Perfect Mirror Glaze
A mirror glaze is essentially a gelatin-based coating enriched with sugar, glucose, and sometimes condensed milk to achieve shine and smoothness. Its success depends on:
-
Proper Gelatin Blooming: Ensures the glaze has enough structure without becoming rubbery.
-
Right Sugar Ratio: Balances sweetness and sheen while maintaining flexibility.
-
Emulsion Control: Combining fats and liquids uniformly to avoid dull patches.
Getting these elements right lays the foundation for a high-quality, professional finish.
2. Control Temperature for Consistency
For pastry professionals, temperature control is everything when it comes to cake glaze. A few key guidelines:
-
Heating Phase: Bring your glaze mixture to around 103–105°C to dissolve sugars evenly.
-
Cooling Phase: Allow the glaze to cool to 30–32°C before pouring. Glazing too hot causes thin, uneven coverage, while glazing too cold leads to clumping and lack of shine.
-
Surface Preparation: Ensure the cake or entremet is frozen before application to achieve a clean, smooth layer.
Precision here ensures mirror-like reflections every time.
3. Achieve Perfect Color and Finish
For seasonal menus or bespoke designs, color customization plays a major role. Professional tips include:
-
Use Oil-Based or Gel Colors: Prevents dulling and maintains uniform gloss.
-
Create Layered Effects: Pour multiple colors simultaneously for marbled or gradient finishes.
-
Avoid Air Bubbles: Strain the glaze through a fine sieve to maintain an ultra-smooth surface.
This attention to detail enhances visual appeal while keeping textures pristine.
4. Troubleshooting Common Mirror Glaze Issues
Even experienced chefs encounter challenges with mirror glazes. Here are solutions to the most common issues:
|
Problem |
Possible Cause |
Professional Solution |
|
Dull finish |
Incorrect temperature or overmixing |
Check cooling point and avoid aeration |
|
Uneven coverage |
Glaze too thick or cake not frozen |
Adjust consistency and ensure proper chilling |
|
Visible bubbles |
Over-whisking or improper straining |
Use a fine sieve before application |
|
Glaze sliding off |
Condensation on cake surface |
Keep cake fully frozen and work in a cool environment |
5. Storage and Handling Best Practices
In professional kitchens, production schedules are tight. Proper storage and handling techniques ensure efficiency without compromising quality:
-
Prepare mirror glaze in advance and store refrigerated for up to 3 days.
-
Reheat gently to 35–40°C before use, avoiding direct high heat.
Always apply glaze in a controlled, cool environment to prevent condensation issues.
Conclusion
Mastering the perfect shiny mirror glaze is all about precision, control, and technique. From understanding ingredient science to managing temperature and solving common challenges, every step contributes to achieving a flawless, glass-like finish. For professional pastry chefs, investing time into refining this skill not only elevates your desserts but also sets your work apart in a highly competitive industry.
FAQs
Q1. What temperature should mirror glaze be applied at?
For best results, pour mirror glaze at 30–32°C onto a frozen cake or entremet.
Q2. How do professionals get a flawless, bubble-free finish?
Strain the glaze through a fine sieve, avoid overmixing, and pour in one smooth motion.
Q3. Can mirror glaze be prepared in advance?
Yes, you can prepare and store it for up to 3 days refrigerated, then gently reheat before use.
Q4. Why does my mirror glaze look dull?
Dullness often comes from pouring at the wrong temperature or overmixing, which traps air bubbles.
What's Your Reaction?
 Like
0
Like
0
 Dislike
0
Dislike
0
 Love
0
Love
0
 Funny
0
Funny
0
 Angry
0
Angry
0
 Sad
0
Sad
0
 Wow
0
Wow
0