The PPF Installation Process: What to Expect
At Houston Car Stereo, we’ve helped thousands of drivers protect their vehicles with high-quality PPF. Here’s a step-by-step guide to the PPF installation process so you know exactly what to expect.
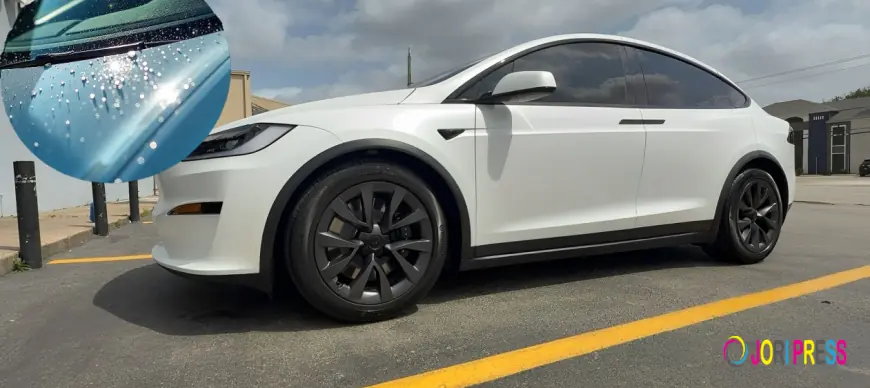
If you’ve decided to invest in paint protection film (PPF) for your car, you’ve made a smart choice. PPF is one of the best ways to protect your vehicle’s paint from rock chips, scratches, road debris, and UV damage — all of which are common on Houston roads.
But if you’ve never had paint protection film installed before, you might be wondering what the process looks like, how long it takes, and what you need to do before and after installation.
At Houston Car Stereo, we’ve helped thousands of drivers protect their vehicles with high-quality PPF. Here’s a step-by-step guide to the PPF installation process so you know exactly what to expect.
Step 1: Vehicle Inspection and Consultation
The process starts with a thorough inspection of your vehicle’s paint. Our team looks for:
- Rock chips
- Scratches
- Swirl marks
- Existing wax or ceramic coatings
- Contaminants like tar, sap, or hard water spots
This step is important because PPF will look its best when applied to a clean, smooth surface. If we find damage, we may recommend paint correction before installation. During the consultation, we’ll also discuss:
- Which areas of your car you want protected (front bumper, hood, full body)
- The type of PPF you prefer (standard, self-healing, or matte finish)
- Your budget and coverage options
Step 2: Vehicle Wash and Paint Decontamination
Once the plan is set, the vehicle gets a thorough wash to remove dirt, grease, and contaminants. We typically follow these steps:
- Hand wash using pH-neutral soap
- Clay bar treatment to remove embedded particles
- Degreasing and panel wipe-down to ensure a perfectly clean surface
This stage is crucial — any dirt left on the paint could get trapped under the film and cause imperfections.
Step 3: Paint Correction (If Needed)
If your car has visible swirl marks or scratches, we may perform paint correction before applying PPF. This involves machine polishing to remove defects and restore a flawless shine. Since PPF locks in whatever is underneath, this step ensures you get the best-looking result possible.
Step 4: Cutting the Film
Next, the PPF is cut to match your car’s panels. We use computer-generated templates for your exact make and model. This ensures:
- Precise fitment
- No need for cutting directly on your paint
- Consistent coverage with clean edges
For custom coverage (like track cars or unique body kits), we can hand-cut the film to perfectly match the panel.
Step 5: Application Process
This is where the real magic happens. Here’s what to expect:
- Slip Solution Application – We spray a special slip solution on the panel and adhesive side of the film. This allows the installer to position the film accurately before it sticks.
- Alignment and Placement – The film is carefully laid on the panel and aligned perfectly to cover all edges.
- Squeegee Out Air and Water – Using professional tools, the installer smooths the film and removes all air bubbles and excess water.
- Heat and Edge Sealing – Heat guns may be used to help the film conform to curves and edges, ensuring a seamless look.
This process is repeated panel by panel until all selected areas are covered.
Step 6: Quality Check
Once the installation is complete, we inspect every panel under proper lighting to ensure there are no bubbles, stretch marks, or lifted edges. A high-quality PPF installation should be virtually invisible when done correctly.
Step 7: Curing Time
The film needs time to settle and bond to the paint. Most vehicles require 24 to 48 hours of curing time before they can be washed or exposed to heavy rain. During this period, you might notice:
- Small water bubbles under the film (they usually disappear within a few days)
- Slight haziness (this clears up as the film fully cures)
Step 8: Aftercare and Maintenance
To keep your PPF looking its best, follow these tips:
- Avoid washing the car for the first 7 days after installation.
- Wash with a gentle, pH-neutral soap.
- Avoid abrasive sponges or brushes.
- Dry with a microfiber towel.
- Waxing is optional — but use PPF-safe wax if you do.
- Inspect edges occasionally to ensure there’s no lifting.
At Houston Car Stereo Shop, we provide aftercare instructions and can even schedule a follow-up appointment to check the film after it has cured.
How Long Does the Whole Process Take?
The time required depends on the coverage:
- Partial Front Coverage: 4–6 hours
- Full Front Coverage: 1 full day
- Full Vehicle Coverage: 2–3 days
These timeframes include prep, installation, and curing.
Why Choose Professional Installation in Houston?
While DIY kits exist, professional PPF installation guarantees:
- No cutting on your paint (avoids accidental scratches)
- Perfect alignment with no bubbles or creases
- Proper edge wrapping for maximum protection
- Use of premium films that last 5–10 years
At Houston Car Stereo, our installers are trained, experienced, and work in a dust-free environment to achieve a flawless finish.
Final Thoughts
Installing paint protection film is one of the best investments you can make in your car — but it’s a detailed process that requires expertise. Now that you know what to expect, you can schedule your PPF installation with confidence.
Whether you want partial front coverage to protect against rock chips or full-body coverage to keep your entire vehicle looking brand new, Houston Car Stereo has you covered.
What's Your Reaction?
 Like
0
 Dislike
0
 Love
0
 Funny
0
 Angry
0
 Sad
0
Sad
0
 Wow
0
Wow
0


