What is the process to Install Windows 10 using the Media Creation Tool?
 datarecovee

Installing a new version of Windows like 10 or 11 requires the use of the Media Creation tool. The Windows 10 media creation tool is an important tool that is required when you are installing or updating Windows on your computer. The guide is going to mention the entire process through which you can easily download a new Windows using the Windows 10 Media creation tool.
Read all the instructions carefully mentioned in the guide to know how you can easily update your Windows.
Why is it important to reinstall Windows?
Unlike people think, reinstalling Windows is important for every computer. Whenever a new version of the operating system is launched, you are required to get the newest version to make use of all the new features added to the operating system.
Sometimes installing a new system is also helpful when you are facing issues on your operating system and you wish to resolve them and the Windows media creation tool is an essential thing that you need for the process.
How to Use the Windows Media Creation tool to install Windows?
There are certain important steps that you need to follow when you want to get a new Windows on your device. Adhere to the instructions mentioned here to update your Windows using the Windows 10 media creation tool.
-
Get the Media Creation Tool
The first thing that users are required to do is to install the Media creation tool from the official Windows website. Use the direct links we are giving here to get the version that you want.
-
Get a Bootable USB Drive ready
After you have the Media creation tool downloaded, you need to prepare a USB drive with a minimum of 8GB for your computer. Insert the drive into your device and start the Media creation tool.
Pick the option that says ‘Create Installation Media for another PC; and further select the other options like language, edition and architecture. Make sure that you have selected the USB drive for the same and wait for the Windows file to be downloaded to your USB.
-
Boot from the USB Drive
Put the USB device that can be booted into the computer to install Windows. Carefully type the BIOS or UEFI settings after starting the computer again. Look for the boot order options and move the USB drive to the top of the list.
After making the changes, you need to close the UEFI or BIOS. At this point, the USB device ought to boot the PC. The USB drive will now boot the computer.
If you also want to learn how to disable sticky keys on Windows then read the blog.
-
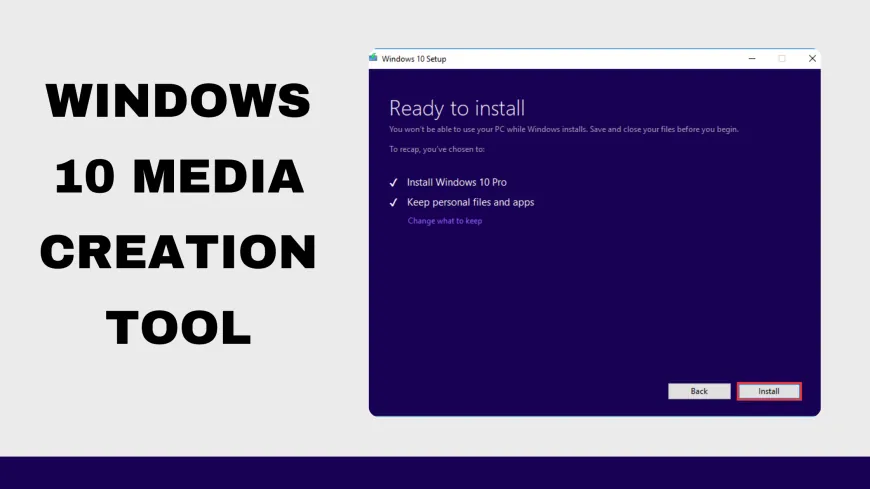
Install Windows on your device
You will now see the Windows Installation screen on your computer where you have to select the language, currency, and time. If you have a Windows product key, you can choose the same option. Choose the option ‘Custom: Install Windows only (advanced)’ when prompted and hit the ‘Next’ button to start the installation process.
Once the installation process is complete, you need to carefully set up your computer to use it without any issues.