A Step-by-Step Guide to DIY Stump Grinding
 csstring

Removing tree stumps from your yard may be a difficult mission, but with the proper tools and strategies, it's definitely possible. Stump grinding is one of the most effective strategies for getting rid of those stubborn remnants. In this complete guide, we'll walk you through the step-by-step technique of DIY stump grinding, empowering you to reclaim your yard's beauty and maximize its ability.
Assess the Situation:
Before diving into stump grinding, it is critical to assess the scenario carefully. Evaluate the scale, vicinity, and accessibility of the stump. Consider any ability limitations, such as rocks, roots, or nearby structures that might prevent the grinding process. This preliminary evaluation will assist you in determining the proper method and equipment needed for the job. Additionally, you have to bear in mind the environmental effect of the stump grinding manner, in particular if there are nearby plant life or flora and fauna that could be affected. By taking all of these elements into attention, you may make certain that the stump grinding manner is completed correctly and effectively.
Gather the Necessary Tools and Equipment:
To correctly grind a stump, you will need the appropriate equipment and device. Key gadgets encompass a stump grinder, protection equipment (which includes goggles, gloves, and ear safety), a shovel, and a chainsaw. Renting a stump grinder from a nearby equipment condominium save is regularly the most price-effective alternative for DIYers. Once the region is apparent, you may then use the chainsaw to cut the stump as near the ground as viable. Next, you may use the shovel to dispose of any last dust or debris around the stump, making it easier to get entry to.
Prepare the Work Area:
Clear the region around the stump of any particles, rocks, or limitations that might interfere with the grinding system. Mark off the perimeter of the painting location to ensure protection and save you from unintentional harm to nearby objects. This will make the grinding process easier and more efficient. Next, function the stump grinder over the stump and begin grinding it down in a returned-and-forth motion till the stump is at least six inches underground degree.
Trim Excess Growth:
Using a chainsaw, trim any excess boom around the base of the stump, which includes roots and low-putting branches. This will make it less difficult to access the stump and prevent the grinder from getting caught on plant life at some point in operation.
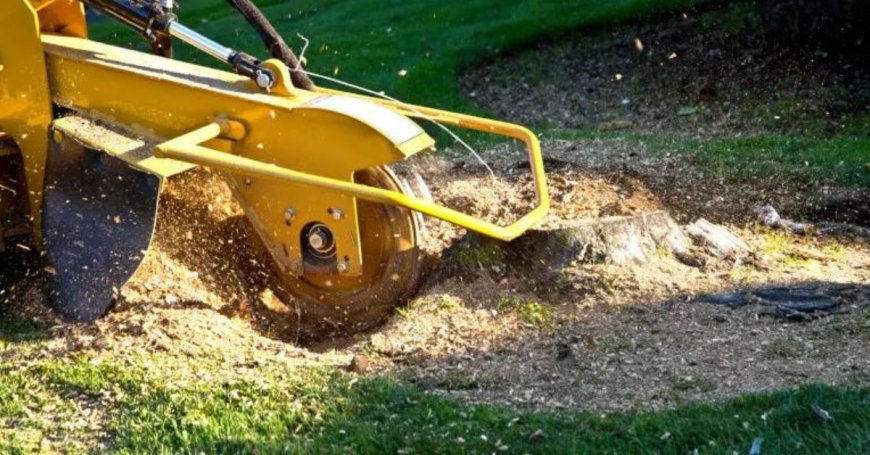
Start Grinding:
With the stump grinder in the role and all safety precautions in the region, it's time to start grinding. Begin with the aid of positioning the grinder above the center of the stump, ensuring that the grinder's blade is at floor degree. Lower the blade steadily into the stump the usage of the gadget's controls, taking care to apply even stress and preserve a steady tempo. Professional stump grinding services offer efficient solutions for removing stubborn tree stumps from your property.
Work in Sections:
For large stumps, it is frequently extra efficient to paint in sections, step-by-step grinding away the stump in concentric circles. Start from the outdoors and paint your manner inward, taking breaks as had to clean away particles and determine progress. Be patient and methodical, adjusting the grinder's intensity and attitude as necessary to achieve the preferred consequences.
Monitor Depth and Progress:
Throughout the grinding system, monitor the intensity of the grinder's blade to make certain constant and thorough removal of the stump. Avoid grinding too deeply, as this can damage the grinder and pose protection dangers. Take everyday breaks to evaluate development and make any necessary changes on your approach.
Dispose of Debris:
Once the stump has been ground down to the ground stage or underneath, use a shovel to clean away any last particles and wooden chips from the painting area. Dispose of the debris responsibly, both by composting it or arranging for correct disposal.
Fill the Hole:
If preferred, fill the hollow left by way of the stump with soil and grass seed to repair the vicinity to its herbal kingdom. Alternatively, you may use the distance for planting plants, shrubs, or other landscaping capabilities to enhance your backyard's aesthetics.
Clean and Maintain Equipment:
After finishing the stump grinding method, smooth and maintain your system according to the producer's instructions. Your tools' lifespan may be increased and their readiness for future use can be guaranteed with proper maintenance.
On the Whole
DIY stump grinding is a profitable assignment that can rework your yard and decorate its ordinary look. By following this step-by-step guide and workout caution and endurance, you could efficaciously cast off tree stumps and reclaim valuable outside areas. Remember to prioritize safety at all times and do not hesitate to are seeking expert assistance in case you stumble upon any challenges beyond your knowledge. With dedication and the proper gear, you will be nice for your manner to a stunning, stump-loose backyard.